Popups make website visits user-friendly and help you gain more newsletter signups fast. Popups have changed drastically in how they look and function. As a result, they are becoming more popular on modern websites now than ever.
What are Popups in Website?
A popup is some kind of informational or promotional offer that displays on top of your content, designed to capture your users’ attention quickly. Typically popups include a call to action (CTA) in an attempt to get your visitor to go do something you want them to.
Benefits of Popups to your Website?
Grabs People’s Attention
Can Help Improve Conversion Rate
Helps in Showcasing Your Brand
Can be Completely Customized
- Makes your website user Friendly
- Collects visitors email data
- Helps to send Push Notifications to multiply users.
- Redirects traffic to your website
How to Create a WordPress Popup Form
If you’re asking yourself how do I create a popup form in WordPress, we’ve got you covered. Check out this step-by-step guide on how to create a WordPress popup contact form.
Step 1: Install the Needed WordPress Plugins
To get started, you’ll need to install and activate 2 plugins.
First, you’ll need Popup Maker. Wondering is popup maker free? Yes, you can use the free version for this tutorial and with WPForms.
Next, you’ll also need the WPForms plugin
Step 2: Create a Simple Contact Form
Next, you’ll want to create the form that you want to put into your WordPress popup form. If you’ve already created a contact form, you can skip this step.
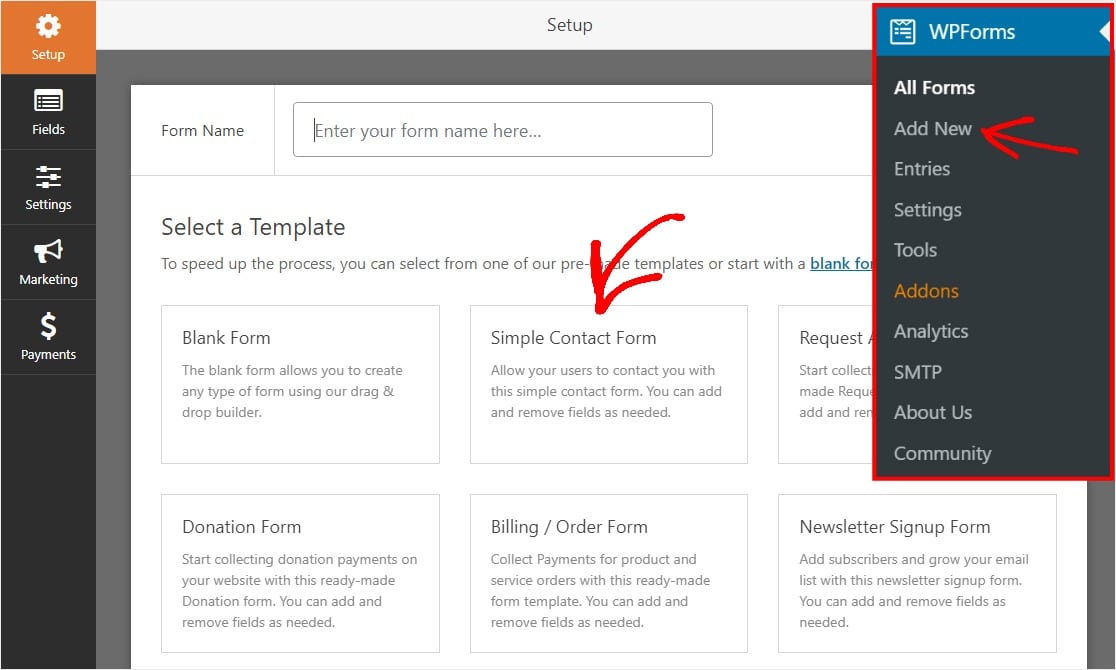
To create your form, go to WPForms » Add New and select a template. For this example, we’ll use a simple contact form. It’s a good idea to keep things simple with WordPress popup forms, so you can maximize your form conversion rates.
Once the form loads, it will have everything you need to get started including:
- First Name
- Last Name
- Comment
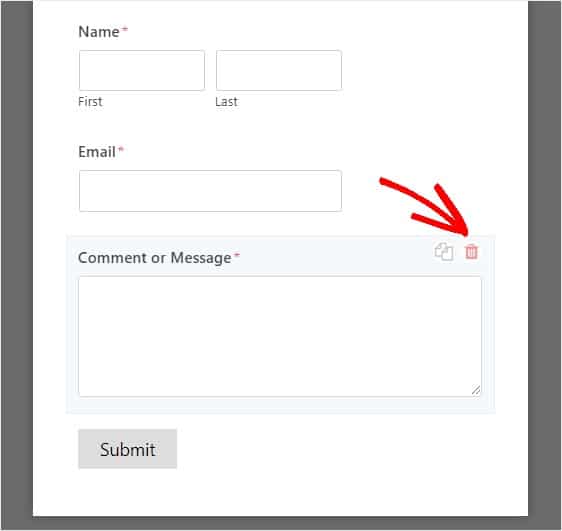
You can drag and drop any additional fields you want from the left side to the preview window. You can also remove a field by clicking on it and selecting the red trash icon that appears on the right.
Once you’re done with creating your form, you need to click on the save button to store your changes. Your contact form is now ready to go!
And now that we have a form ready, let’s move on to the next step and create a popup in WordPress.
Step 3: Create a Popup in Popup Maker
Great, your plugins are installed and activated. Next, we’ll go into the Popup Maker plugin to create your popup. This free WordPress plugin lets you make popups from scratch, easily.
Head to your WordPress dashboard and go to Popup Maker » Add Popup, and you’ll see the popup editing screen appear.
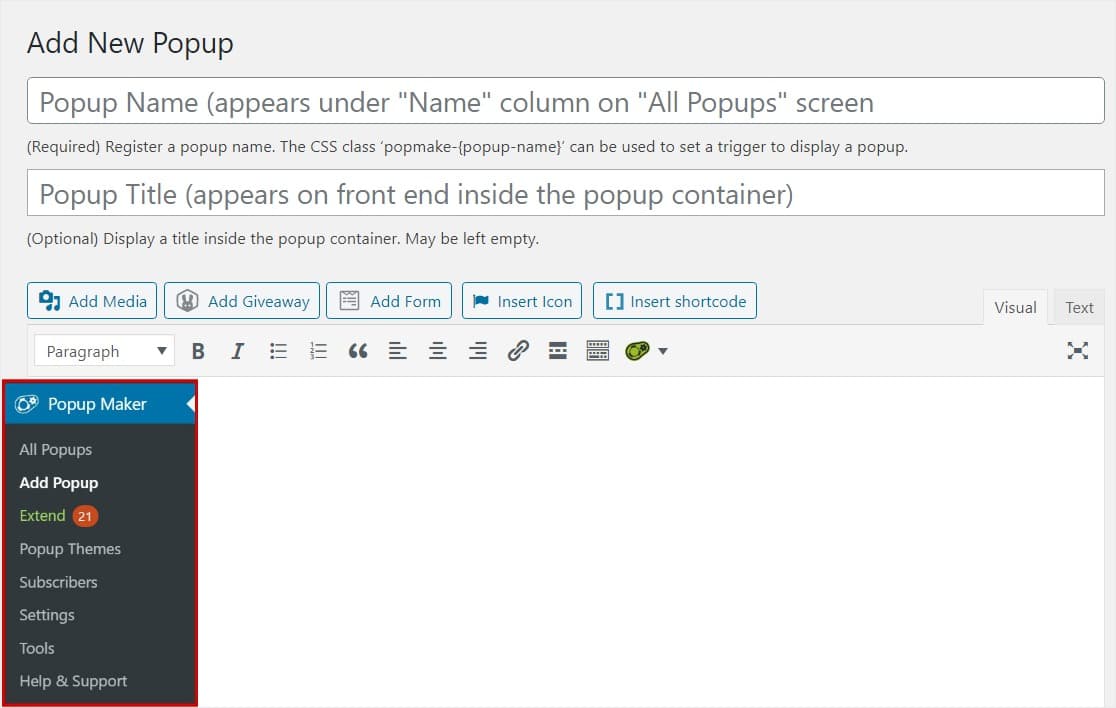
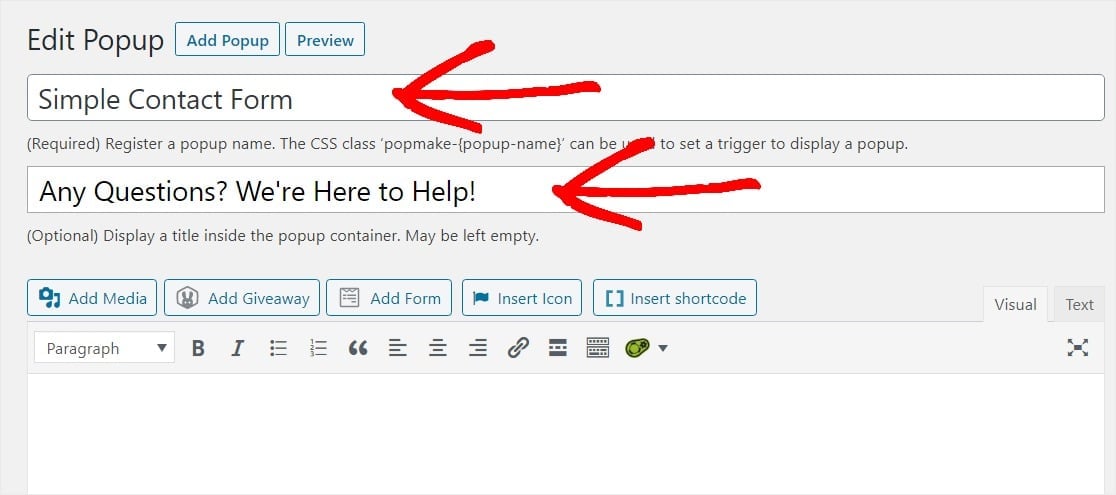
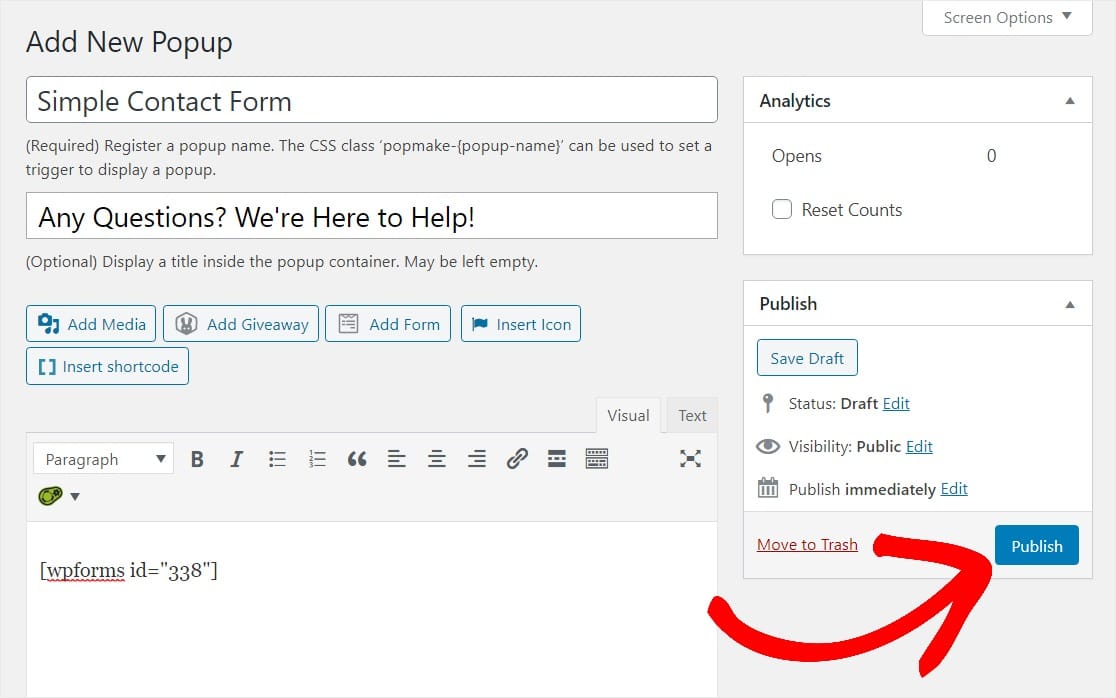
On this screen, you’ll want to enter a name for your popup. Plus, you can also enter a optional display title like we did in this example. Your visitors will be able to see this optional display title.
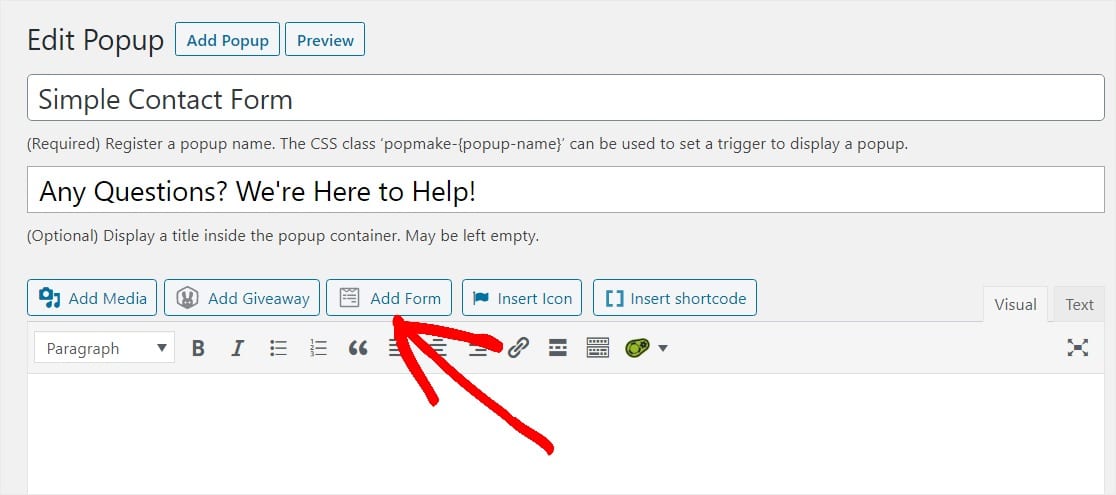
And now it’s time to insert your form into your popup. Click on the Add Form button to select your form.
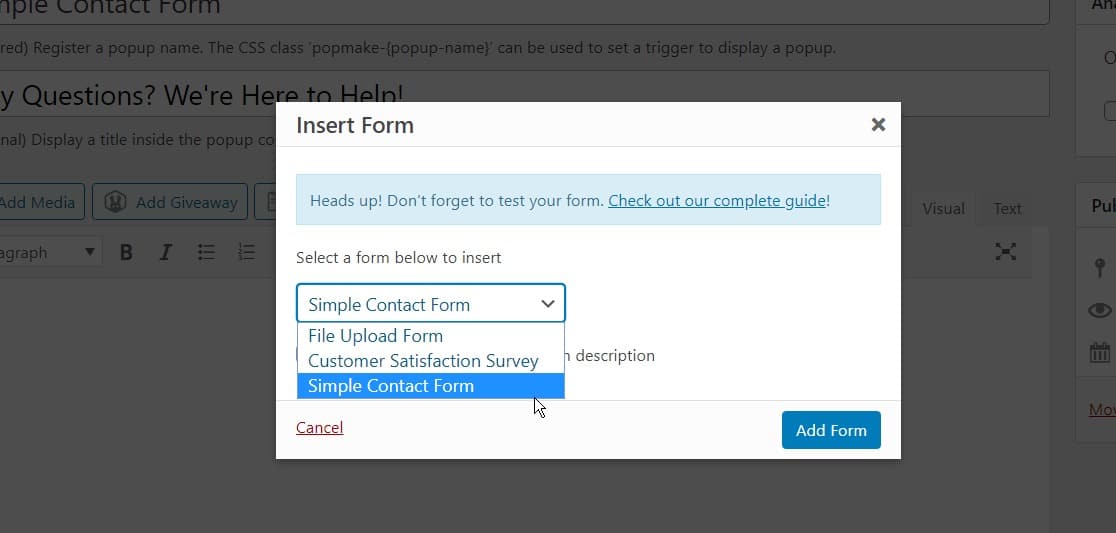
An Insert Form screen will appear. Here, you can pick the form you want to insert into this popup by selecting it from the dropdown menu.
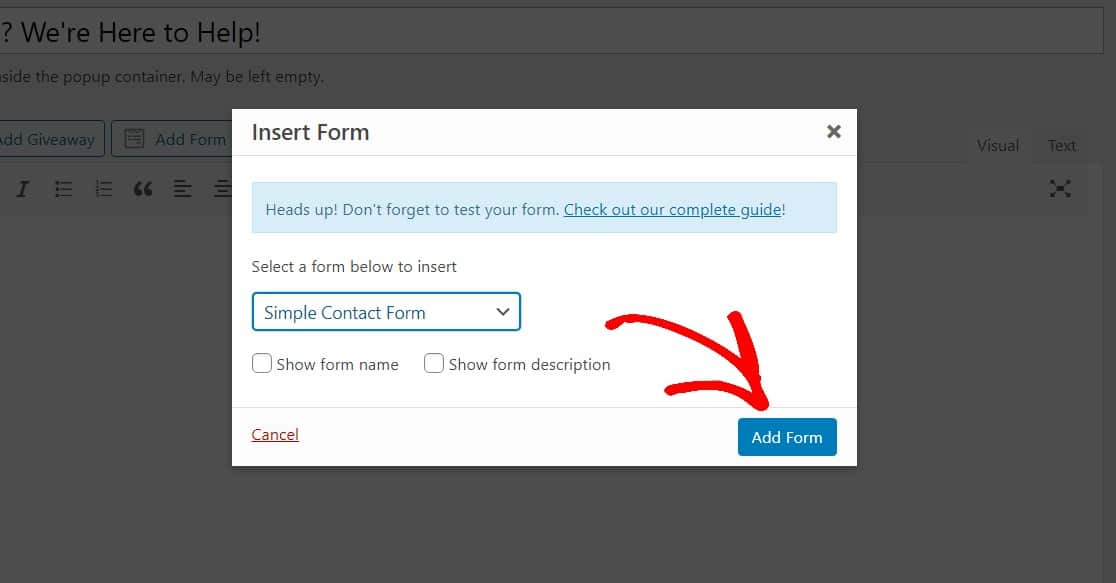
Once the form is selected, click on the blue Add Form button to add it to your popup.
You’ll see a unique shortcode appear which tells that popup which form to use.
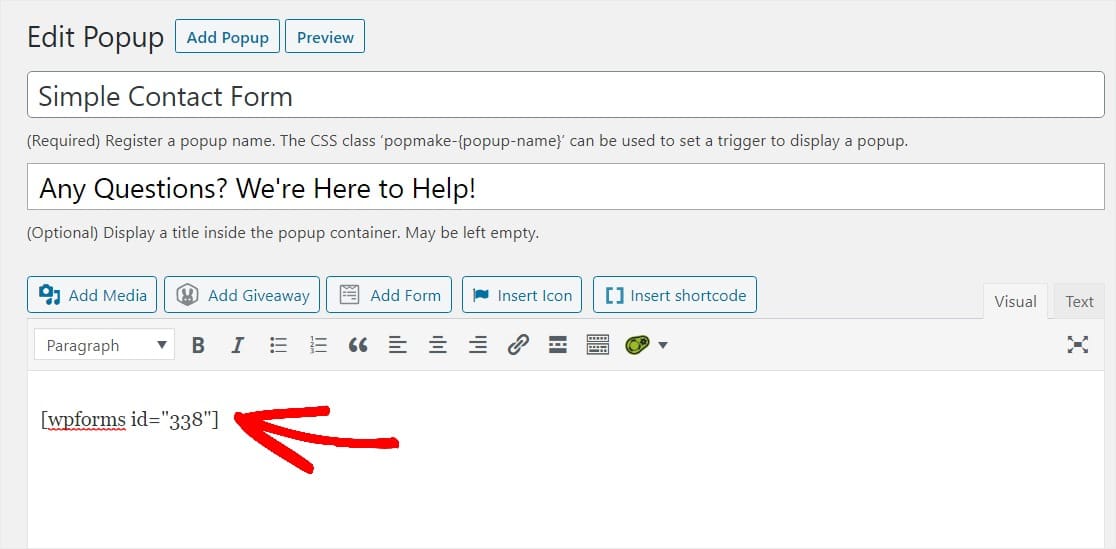
Great job. Let’s customize a few of the popup settings by scrolling down and starting with Triggers.
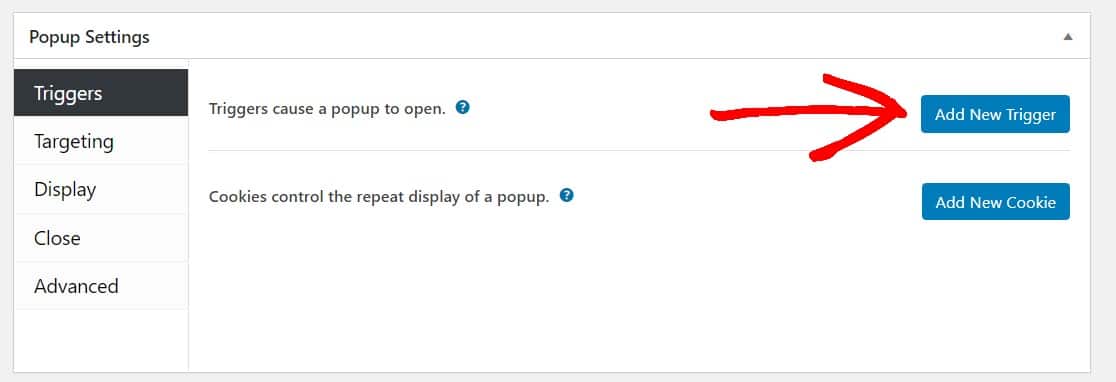
Triggers tell your popup when to open. Click on the blue Add New Trigger button.
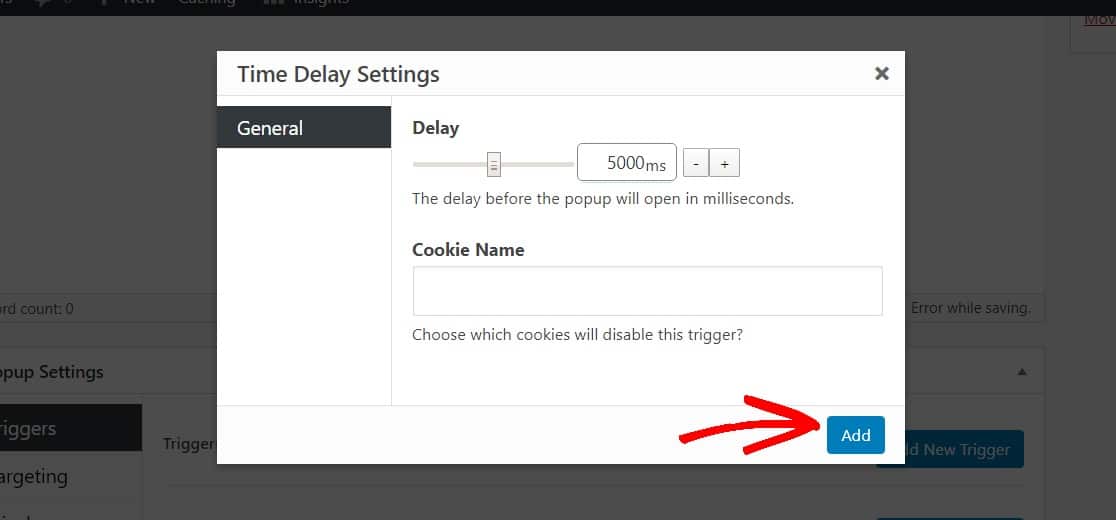
On the trigger option window that appears, open the dropdown and select Time Delay/Auto Open. This will trigger the popup to open after your website visitors have been on the page for a set amount of time.
You can set the time for anything you’d like, but we suggest starting with 5 seconds (5,000 milliseconds). When you’re ready, click the Add button to continue.
By default, this popup will show on every page of your WordPress website and to everyone on all devices. You can adjust these settings to target specific people, devices, places (like a post or page), and more under Targeting. In fact, for more advanced settings, check out the Popup Maker documentation.
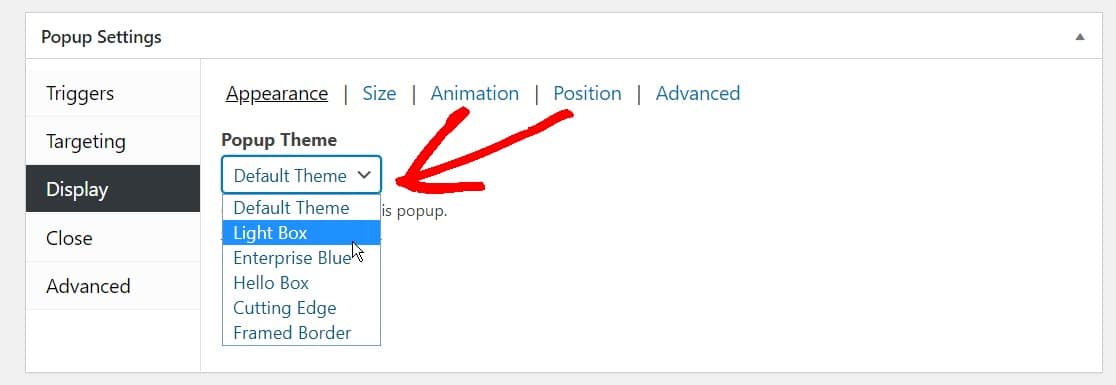
Next, let’s spruce up the look of your popup by clicking on Display under the popup settings.
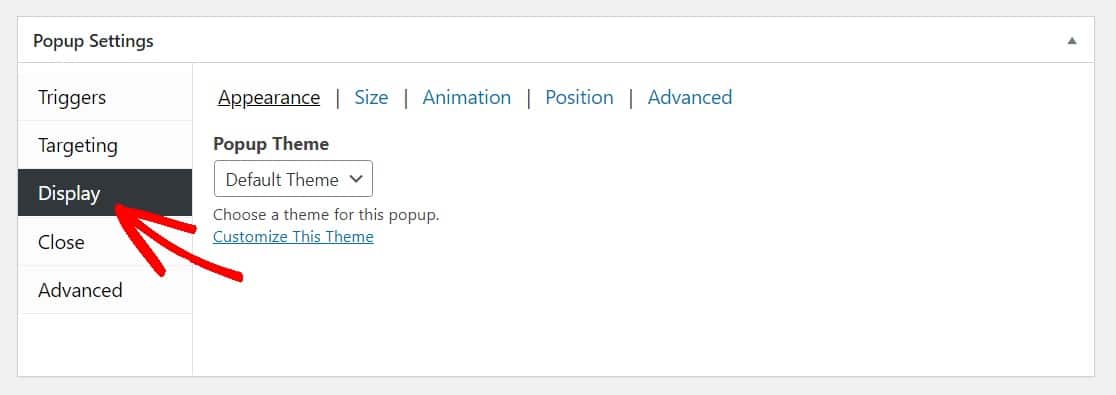
From the Popup Theme dropdown, select a theme for your popup.
You can choose whichever Popup Theme you like. For this example, we’re picking the popular Light Box style.
Now, adjust any other settings you’d like and when you’re ready, let’s go ahead and publish your form.
Scroll up on the page to the top and click on the Publish button to make your WordPress popup form live.
And there you have it! You can now preview your WordPress popup form to make sure it looks exactly like you want it to, and adjust the settings accordingly.
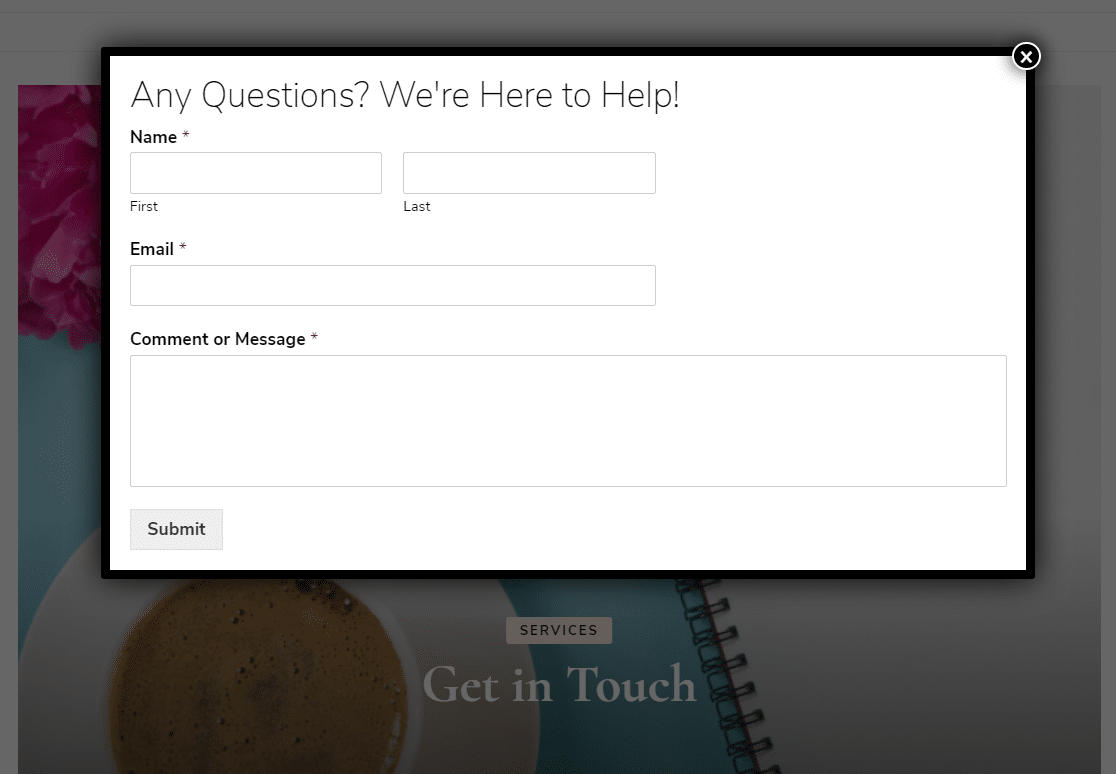
To make more contact form popups, you can repeat this process and customize the settings and display rules to appear on different posts or pages, etc. Or you can get creative and make a popup WordPress survey.
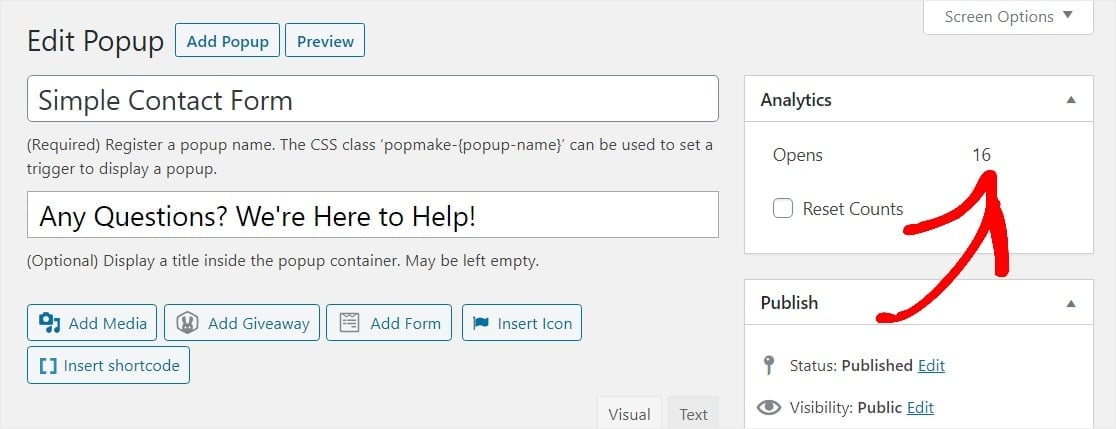
Head back to the edit page to keep an eye on the Analytics if you want to know how many people have viewed your WordPress popup form.
Also, if you’ve set up Google Analytics on your website, you can track Popup Maker through custom event tracking.
And don’t forget, you can set up your WordPress popup form to connect directly with your email marketing service to make it even easier to organize and automatically reach out to your new contacts.
ecozeen
I'm a software engineer with a wealth of experience building web solutions for personal brands and organizations.

